

If you’re craving a warm, comforting dessert that feels like a cozy hug in every bite, this Gur ki Kheer will absolutely steal your heart. Velvety, sweet, and aromatic with the richness of jaggery and the subtle notes of cardamom, this traditional Indian rice pudding is pure bliss in a bowl. Whether served during festivals, after a family meal, or just as a sweet craving fix, Gur ki Kheer delivers warmth and wholesomeness that soothes both heart and soul.
Unlike the usual sugar-based kheer, this Gur ki Kheer replaces refined sugar with jaggery (gur)—a natural sweetener loaded with minerals and earthy flavor. This small twist not only enhances the richness of the dish but also makes it gentler on the body. Plus, it gives the dessert a beautiful golden-brown hue that looks as indulgent as it tastes. It’s slow-cooked, creamy, and wonderfully nourishing—a perfect fusion of flavor and comfort.
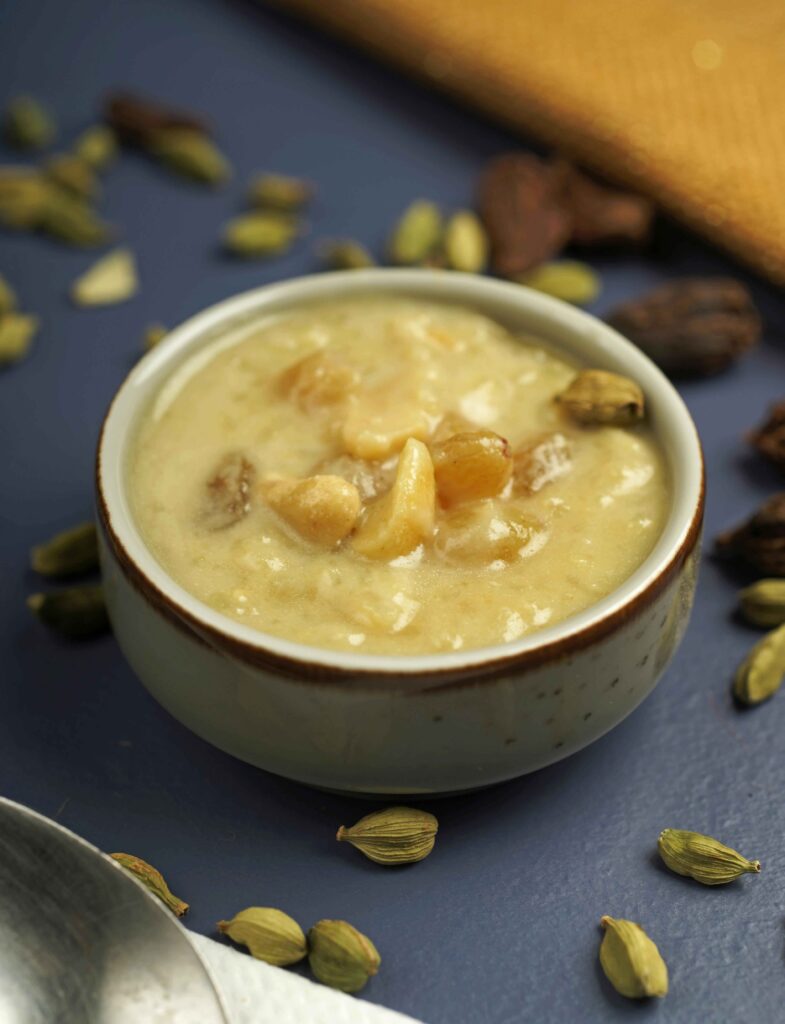
What truly makes this Gur ki Kheer special is the method—the way the rice is simmered patiently in milk until it’s luxuriously thick, then lovingly blended with warm, melted jaggery. Finished with ghee-fried cashews, almonds, and cardamom, each spoonful of this kheer offers a spoonful of joy, making it a must-try for those who adore authentic Indian sweets with a rustic, earthy edge.
Preparation Time to Make Gur ki Kheer
- Preparation Time: 10 minutes
- Cooking Time: 40 minutes
- Total Time: ~50 minutes
- Servings: 4
Ingredients for Gur ki Kheer
Dry Ingredients:
- Basmati Rice – ¼ cup (washed and soaked for 30 minutes) (~50g) (~180 calories)
- Cardamom Powder – ½ teaspoon
- Grated or Chopped Jaggery (Gur) – ¾ cup (~150g) (~600 calories)
- Salt – A pinch (to balance the sweetness)
Wet Ingredients:
- Full-Fat Milk – 1 liter (~1030 calories)
- Ghee – 2 tablespoons (~30g) (~270 calories)
- Water – ¼ cup (to melt the jaggery)
For Garnish (Optional but Recommended):
- Cashew Nuts – 10–12 pieces (~60 calories)
- Almond Slivers – 1 tablespoon (~50 calories)
- Raisins – 1 tablespoon (~30 calories)
- Saffron Strands – 6–8 strands soaked in 1 tbsp warm milk
- Rose Petals or Edible Silver Foil – For visual appeal
Instructions: How to Make Gur ki Kheer
Step 1: Prepare and Soak the Rice
First and foremost, rinse the rice thoroughly 2–3 times until the water runs clear. Then, soak it in water for at least 30 minutes to soften the grains and reduce cooking time. Once soaked, drain and keep it aside.
Tip: Using basmati rice ensures a rich aroma and adds elegance to the kheer. However, any short-grain rice also works well if that’s what you have on hand.
Step 2: Boil and Simmer the Milk
Next, in a heavy-bottomed pan or deep kadhai, pour the milk and bring it to a gentle boil on medium flame. Stir occasionally to prevent it from sticking to the base. Once the milk starts to boil, reduce the heat to low and let it simmer for 5–7 minutes.
Tip: Scrape the sides of the pan and stir the cream back into the milk—this makes the kheer richer and creamier.
Step 3: Add Rice and Cook
Now, add the soaked and drained rice to the simmering milk. Cook it on low heat, stirring regularly to avoid scorching. Let the rice cook slowly in the milk until it becomes soft and the mixture thickens. This may take 20–25 minutes.
As the rice cooks, it absorbs the milk, turning the mixture creamy and velvety.
Tip: Stir every few minutes and make sure to scrape the base and sides of the pan frequently to prevent burning.
Step 4: Melt the Jaggery Separately
Meanwhile, in a small saucepan, combine the grated jaggery and ¼ cup of water. Heat this mixture gently until the jaggery dissolves completely, creating a smooth syrup. Strain it to remove any impurities and let it cool slightly.
Important: Never add jaggery directly to boiling milk. It may cause curdling. Always cool the milk slightly before adding jaggery syrup.
Step 5: Roast the Dry Fruits
In a small pan, heat 2 tablespoons of ghee. Add cashews and sauté until golden brown. Then, toss in the raisins and cook until they puff up. Add almond slivers and fry for 30 seconds more. Remove everything and keep aside.
Tip: You can use pistachios, chironji, or even grated coconut for additional texture and taste.
Step 6: Add Jaggery Syrup and Spices
Once the rice is fully cooked and the milk has thickened to your liking, turn off the heat. Allow it to cool for 2–3 minutes. Then, slowly pour the prepared jaggery syrup into the kheer, stirring continuously.
Immediately add cardamom powder and half of the roasted nuts. Mix well.
Tip: Keep the heat off during this step to avoid curdling.
Step 7: Simmer Again (Optional)
If desired, turn the flame on low and let the kheer simmer gently for another 3–5 minutes to marry the flavors. Stir often and avoid bringing it to a full boil.
Step 8: Garnish and Serve
Finally, transfer the Gur ki Kheer into serving bowls. Garnish with the reserved roasted cashews, almonds, raisins, and a sprinkle of saffron strands. For a royal touch, you may also add edible rose petals or a silver leaf (varak).
Serving Tips: Serve warm during winter or chilled in summer. It’s divine either way.
Why You’ll Love This Gur ki Kheer Recipe
- Healthier Sweetener: Using jaggery instead of sugar makes it a more wholesome dessert.
- Creamy & Aromatic: Slow-cooked milk and cardamom make it irresistibly rich.
- Festive Favorite: Perfect for festivals like Makar Sankranti, Janmashtami, or Baisakhi.
- Easy to Prepare: Needs only a handful of basic ingredients.
- Versatile: Can be customized with coconut milk, fruits, or millets for variation.
- Naturally Gluten-Free: Safe and enjoyable for those avoiding gluten.
Variations and Additions
- Coconut Gur ki Kheer: Add ½ cup of coconut milk in place of regular milk or along with it for a tropical twist.
- Gur Seviyan: Swap rice with vermicelli (seviyan) for a jaggery-based seviyan kheer.
- Millet Jaggery Kheer: Use little millet (samak) or foxtail millet for a more nutritious alternative.
- Dry Ginger Touch: Add ½ teaspoon dry ginger powder for a winter-special version.
- Fruit Jaggery Kheer: Top with banana slices or stewed apple for extra texture and sweetness.
- Vegan Gur ki Kheer: Use almond or coconut milk and skip the ghee—still rich and satisfying.
Nutritional Information (Per Serving Approx.)
- Calories: 450–500 kcal
- Carbohydrates: 55–65g
- Protein: 7–9g
- Fat: 20–25g
- Fiber: 2–3g
- Sugar: 25–30g
- Calcium: 180–220mg
- Iron: 2–3mg
Note: Nutrition values will vary depending on the quantity of dry fruits, milk, and jaggery used.
Storage Tips for Gur ki Kheer
- Refrigeration: Store in an airtight container for up to 3 days in the fridge.
- Reheating: Reheat gently on low flame or in a microwave. Add a splash of milk to restore the creamy texture.
- Freezing: Avoid freezing, as milk-based dishes tend to split when thawed.
- Make-Ahead Tip: You can prepare the rice-milk base in advance. Just add jaggery before serving for best taste and freshness.
Leave a Reply Cancel reply