If you’re in search of a festive treat that’s buttery, colorful, and charmingly nostalgic, this Easter Cookie Recipe is exactly what you need. These delightful cookies are not only a delicious addition to your spring celebrations but also serve as edible decorations that bring joy to both eyes and taste buds. From pastel icing to sweet shapes like bunnies, eggs, and flowers, these Easter cookie Recipe are a true celebration of the season.
Made using simple pantry staples such as flour, butter, sugar, and eggs, this Easter cookie recipe turns everyday ingredients into works of edible art. Whether you’re hosting a cheerful Easter brunch, preparing Easter baskets for your loved ones, or simply enjoying a moment of seasonal baking bliss, these cookies provide a perfect blend of tradition, taste, and creativity.
What makes this Easter Cookie Recipe truly enchanting is its adaptability and aesthetic charm. In addition, you don’t need any fancy tools or professional decorating skills to pull off a batch that looks and tastes bakery-worthy. These cookies are also an ideal canvas for kids and adults alike to get involved in the decorating fun. With a variety of icing colors, sprinkles, and shapes to play with, they’re a perfect weekend or holiday baking project.
Whether you’re baking for gifting, entertaining, or simply enjoying the process of decorating, these cookies are bound to make your Easter celebration extra sweet and special.
Preparation Time for Easter Cookie Recipe
- Preparation Time: 20 minutes
- Chilling Time: 60 minutes
- Baking Time: 10–12 minutes per batch
- Decorating Time: 30–40 minutes
- Total Time: ~2.5 hours
Ingredients for Easter Cookie Recipe
Main Ingredients (Sugar Cookies):
- All-Purpose Flour – 2¾ cups (~330g; ~1210 calories)
- Unsalted Butter (softened) – 1 cup (~227g; ~1628 calories)
- Granulated Sugar – 1 cup (~200g; ~774 calories)
- Large Eggs – 1 (~70 calories)
- Vanilla Extract – 1½ tsp (~18 calories)
- Almond Extract (optional) – ½ tsp (~6 calories)
- Baking Powder – 1 tsp (~2 calories)
- Salt – ½ tsp (~0 calories)
For Icing (Royal Icing Version):
- Powdered Sugar – 4 cups (~480g; ~1920 calories)
- Meringue Powder – 3 tbsp (~30g; ~120 calories)
- Water – 6 tbsp (~0 calories)
- Gel Food Coloring – as needed (~0 calories)
Optional Decorating Add-Ons:
- Pastel Sprinkles – 2 tbsp (~80 calories)
- Edible Pearls – 1 tbsp (~50 calories)
- Shredded Coconut (dyed green for grass) – ¼ cup (~100 calories)
- Mini Chocolate Eggs – ½ cup (~360 calories)
Instructions: How to Make Easter Cookies
Step 1: Cream the Butter and Sugar
Start by adding the softened butter and sugar into a large mixing bowl. Using an electric mixer, cream the two ingredients together on medium-high speed for about 3–4 minutes, until the mixture becomes light, fluffy, and pale in color.
Tip: Scrape down the sides of the bowl midway to ensure even mixing.
Step 2: Add Egg and Flavorings
Once the butter and sugar are well combined, add the egg, vanilla extract, and almond extract (if using). Continue to beat the mixture on low speed until everything is smoothly incorporated. The mixture should look creamy and slightly thick.
Why almond extract? It adds a delicate, nutty undertone that beautifully complements the vanilla and butter.
Step 3: Sift and Mix the Dry Ingredients
In a separate bowl, sift together the all-purpose flour, baking powder, and salt. Sifting ensures your cookie dough is smooth and lump-free.
Gradually add the dry ingredients to the wet mixture, about ½ cup at a time. Mix on low speed until a soft but not sticky dough forms.
Optional Add-In: Add a teaspoon of citrus zest (lemon or orange) for a springtime twist.
Step 4: Chill the Dough
Transfer the dough onto a floured surface. Divide into two portions and flatten each into a disc. Wrap tightly in plastic wrap and refrigerate for at least 1 hour.
Why chill? This firms up the dough, making it easier to roll and cut into shapes without sticking.
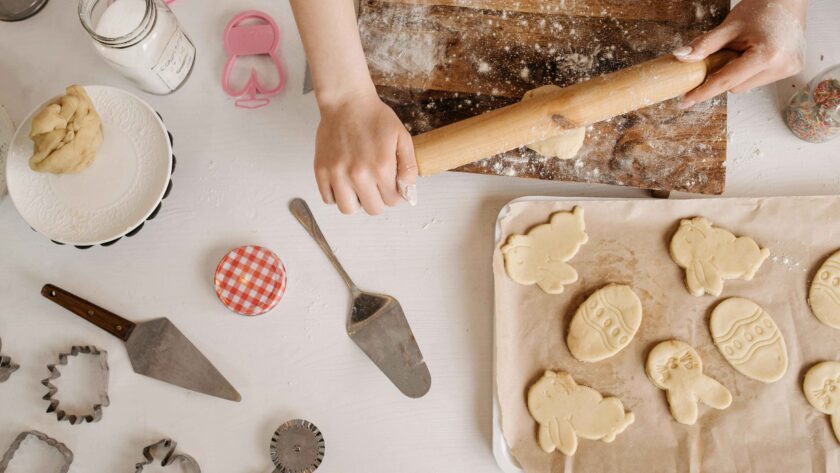
Step 5: Roll and Cut the Dough
Once chilled, preheat the oven to 350°F (175°C). Line baking sheets with parchment paper.
Lightly flour your rolling surface and pin. Roll one disc at a time to about ¼ inch thickness.
Using Easter-themed cookie cutters (bunny, egg, chick, flower, etc.), cut out shapes and transfer them carefully to the prepared baking sheets, spacing them about 1 inch apart.
Pro Tip: Dip cookie cutters in flour to prevent sticking.
Step 6: Bake to Perfection
Bake cookies in the preheated oven for 10–12 minutes or until the edges are just beginning to turn golden. Avoid overbaking for soft cookies.
Remove the cookies and let them sit on the baking sheet for 5 minutes before transferring them to a wire rack to cool completely.
Step 7: Make the Royal Icing
While cookies are cooling, prepare your royal icing. In a mixing bowl, combine powdered sugar, meringue powder, and water. Beat on high speed for 5–7 minutes until the icing forms stiff peaks.
Divide the icing into smaller bowls and color each with a few drops of gel food coloring to create pastel tones like pink, yellow, lavender, mint, and baby blue.
Tip: Use a piping bag with a small round tip for outlining and flooding cookies. You can also use squeeze bottles for easier decorating.
Step 8: Decorate with Joy
Once cookies are fully cooled, outline each cookie with royal icing and then flood the center by adding more icing and gently spreading with a toothpick or scribe tool.
Add sprinkles, edible pearls, coconut grass, or mini chocolate eggs before the icing sets.
Allow the decorated cookies to dry uncovered for at least 4 hours or overnight for a firm finish.
")
Calorie Breakdown (Estimated)
- Flour (330g): ~1210 calories
- Butter (227g): ~1628 calories
- Sugar (200g): ~774 calories
- Egg (1): ~70 calories
- Flavorings: ~24 calories
- Baking Powder/Salt: ~2 calories
- Icing (royal + decor): ~2530 calories
- Total (without toppings): ~4230–5000 calories
- Servings: 24 cookies
- Per Cookie: ~180–210 calories (depending on size and decoration)
Why This Recipe Works
1. Perfect Texture Every Time
Thanks to chilled dough and precise baking, these cookies hold their shape while remaining tender and buttery inside.
2. Easy to Decorate
The royal icing sets to a glossy finish, making the cookies look professionally made—even if decorated at home.
3. Versatile Flavors
From classic vanilla to citrus or almond notes, the base dough is easy to customize without sacrificing texture.
4. Great for Gifting
Packaged in boxes or jars, these cookies are ideal for Easter baskets, party favors, or a sweet thank-you gift.
5. Family Fun Activity
Decorating Easter cookies is a fun bonding experience. Everyone can create their own edible masterpiece.
FAQs
Can I use store-bought frosting instead of royal icing?
Yes, but royal icing gives the best results for detailed decoration and sets with a smooth finish.
How long do decorated Easter cookies last?
In an airtight container at room temperature, they last up to 1 week. You can also freeze undecorated cookies for up to 3 months.
Can I skip chilling the dough?
Not recommended. Chilling prevents spreading and ensures crisp, clean cookie shapes.
What’s the best food coloring for icing?
Gel food coloring is highly concentrated and doesn’t thin out the icing like liquid colors do.
Can kids help with this recipe?
Absolutely! Rolling dough, cutting shapes, and decorating cookies are all kid-friendly tasks (with supervision).
Can I make these gluten-free?
Yes. Substitute all-purpose flour with a gluten-free blend (1:1 ratio). Make sure it’s a baking-specific mix with xanthan gum included.
Is meringue powder necessary?
For royal icing, yes. However, you can also use pasteurized egg whites as a substitute.
What other shapes can I use?
Chicks, bunnies, eggs, carrots, crosses, and flowers are popular Easter symbols, but feel free to get creative!
What Makes This Recipe Special?
Cookies That Celebrate Spring
From the vibrant colors to the adorable shapes, these cookies are a delicious representation of Easter joy.
Aesthetic Meets Delicious
They not only look gorgeous on display but also deliver a rich, buttery flavor in every bite.
Make-Ahead Friendly
You can bake and freeze the cookies ahead of time, then decorate closer to Easter—great for busy schedules.
Customizable in Every Way
Whether you like soft or crispy, pastel or bold colors, this recipe molds to your preferences and imagination.
Instagram-Worthy Fun
A batch of these cookies adds a pop of seasonal flair to your feed, especially when paired with spring florals or Easter baskets.
Festive and Fuss-Free
Despite their decorated appearance, the process is approachable and enjoyable even for novice bakers.